Recent Posts
Tips for salvaging and restoring fire-damaged furniture
12/18/2024 (Permalink)
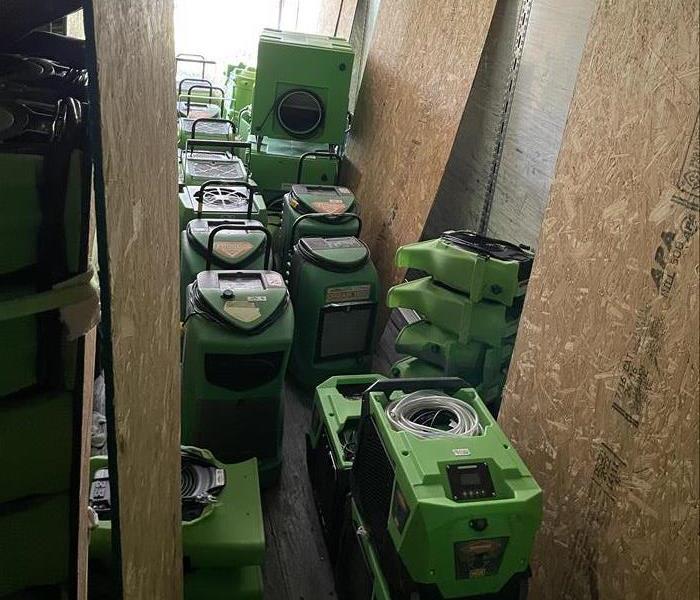 SERVPRO of NE Hillsborough/Plant City can help with specialized cleaning, odor removal, and repairs to make your furniture look as good as new.
A fire can leave behind extensive damage, not just to your property, but also to your cherished furniture. While some items may be beyond repair, many pieces can be salvaged with the right techniques. As experts in fire damage restoration, SERVPRO® of NE Hillsborough/Plant City offers these practical tips to help you restore fire-damaged furniture and bring it back to life.
Assess the Damage Before Starting Restoration
The first step in restoring fire-damaged furniture is to thoroughly assess the damage. Determine whether the piece has suffered from smoke, soot, water exposure, or all three. Smoke and soot can penetrate porous materials like wood and upholstery, while water from firefighting efforts can lead to swelling, warping, or stains. According to the National Fire Protection Association (NFPA), 73% of civilian structure fires involved homes, meaning the impact on personal belongings is significant. Carefully inspecting each item helps decide if it can be salvaged or should be replaced.
Cleaning Smoke and Soot from Furniture
Smoke and soot residues can cause permanent discoloration if not addressed quickly. For wooden furniture, start by using a vacuum with a brush attachment to remove loose soot particles. Avoid rubbing, as this can embed the soot deeper. Afterward, wipe down the surface with a dry chemical sponge specifically designed for fire restoration. If the smoke smell persists, consider using odor-neutralizing products or ozone treatments to eliminate odors.
For upholstered furniture, the process can be more complex due to the porous nature of fabric. It’s best to consult professional fire restoration services for deep cleaning to avoid further damage. However, if you opt for a DIY approach, start by vacuuming the fabric, then use a low-moisture cleaner or a specialized soot remover for fabrics.
Restoring Wooden Furniture
Water damage is common after firefighting efforts, often leading to swollen wood or peeling finishes. If the wood has warped, it may be necessary to disassemble the piece to dry it out slowly and evenly. Use a soft cloth and wood-safe cleaning solution to remove surface stains, and consider refinishing the wood if the damage is significant.
Tips for Restoring Wood Furniture:
- Remove loose soot with a vacuum or brush.
- Clean surfaces with wood-safe solutions to avoid further damage.
- Refinish if needed to restore the original appearance.
Know When to Call in the Professionals
While some restoration work can be done yourself, certain pieces may require professional services for complete restoration. SERVPRO of NE Hillsborough/Plant City can help with specialized cleaning, odor removal, and repairs to make your furniture look as good as new.
Following these tips can help you salvage fire-damaged furniture and bring it back to life. However, when in doubt, always seek professional advice to ensure the best possible outcome.
How long before mold develops in a leaking roof?
11/13/2024 (Permalink)
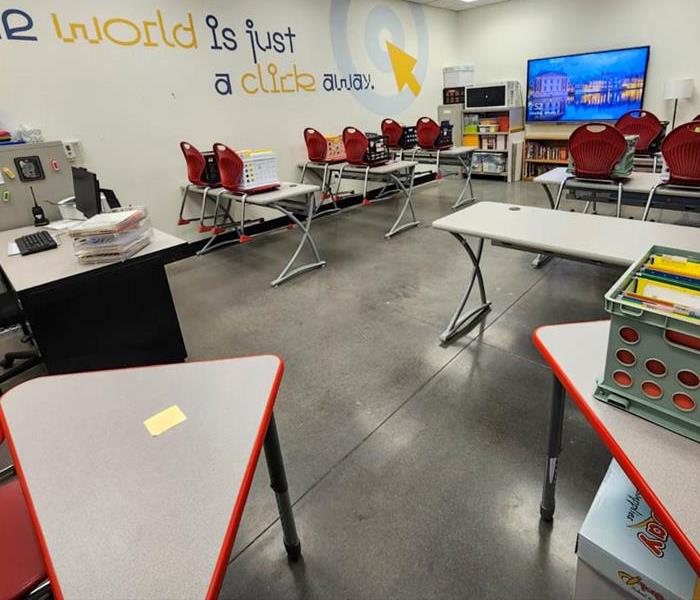 By acting quickly, you can save time, money, and protect your home from long-term structural damage.
Roof leaks can be a homeowner’s worst nightmare, not only because of the water damage they cause but also due to the risk of mold growth. If left unchecked, a leaking roof creates the perfect environment for mold to thrive. But how long does it take for mold to develop once a leak begins? Let’s dive into expert insights and what you need to know to protect your home.
How Quickly Can Mold Develop?
Mold can start growing in as little as 24 to 48 hours after a leak begins. This timeline is significantly impacted by factors such as the size of the leak, the temperature, and the humidity levels in your home. A moist, humid environment speeds up mold growth, especially in hidden areas like attic spaces or within your walls. The rapidity of mold growth makes it crucial to address roof leaks as soon as they’re discovered to prevent further damage.
According to the Federal Emergency Management Agency (FEMA), "mold can grow within 24-48 hours after water exposure" and will continue spreading unless moisture is controlled.
Key Areas Vulnerable to Mold Growth
When your roof leaks, water can seep into various parts of your home, creating the perfect breeding ground for mold. Be sure to check the following areas:
- Attic and insulation: Water trapped in insulation can easily go unnoticed, providing mold with the ideal environment to grow.
- Walls and ceilings: Water can move down walls or pool in ceilings, creating hidden pockets of moisture.
- Wooden structures: Mold thrives on organic materials like wood, and the framing in your roof or attic can quickly become compromised.
Signs of Mold Growth from a Roof Leak
Addressing mold early is key to minimizing damage. Here are some common signs that mold may be growing due to a roof leak:
- Visible mold spots on ceilings or walls
- Musty odors in areas near the leak
- Discolored patches or water stains on surfaces
How to Prevent Mold from Developing
To prevent mold from developing after a roof leak, follow these steps:
- Fix leaks immediately – As soon as you notice a leak, have it repaired to prevent water from infiltrating your home.
- Dry affected areas – Use fans, dehumidifiers, or professional drying equipment to remove moisture.
- Inspect regularly – Perform routine roof inspections, especially after storms, to catch leaks before they cause further issues.
At SERVPRO of NE Hillsborough/Plant City, we specialize in water damage restoration and mold remediation. If you suspect mold growth from a leaking roof, don’t wait. Our team has the experience, expertise, and equipment to handle the situation professionally and prevent further damage.
By acting quickly, you can save time, money, and protect your home from long-term structural damage.
Protect Your Home: Exterior Maintenance Tips to Safeguard Against Water Intrusion
10/16/2024 (Permalink)
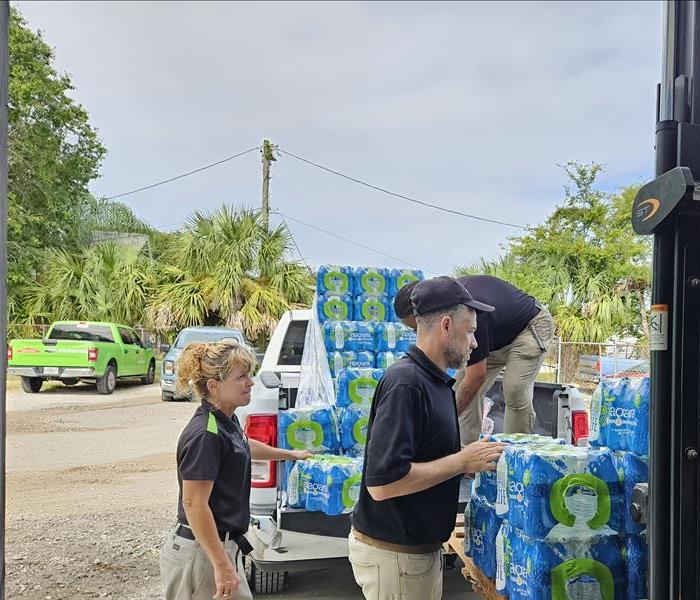 Here are key strategies to protect your property from water intrusion and ensure it remains safe and dry year-round.
Water intrusion in Hillsborough, FL, is one of the most common threats to your home’s structural integrity. Left unchecked, it can cause extensive damage to your foundation, walls, and roofing. In fact, water damage accounts for nearly 14,000 home insurance claims every day in the U.S. Proper exterior maintenance is essential in preventing water from penetrating your home. Here are key strategies to protect your property from water intrusion and ensure it remains safe and dry year-round.
Inspect Your Roof Regularly
Your roof is your home's first line of defense against water intrusion. Small leaks can develop over time and lead to significant water damage if not addressed promptly. To protect your home:
- Inspect for Missing or Damaged Shingles: Check for any missing, cracked, or curling shingles and replace them immediately. Damaged shingles allow water to seep underneath and compromise the roof’s structure.
- Clean and Maintain Gutters: Clogged gutters can cause water to back up and pool near your roofline, leading to leaks and damage. Clean your gutters regularly, especially after heavy storms or the autumn season when leaves and debris are more likely to accumulate.
- Check Flashing: Ensure the flashing around your chimney, vents, and skylights is intact and properly sealed. Faulty flashing is a common source of leaks.
Seal Windows and Doors
Windows and doors are potential entry points for water if not properly sealed. Over time, the caulking and weather stripping around them can wear out, allowing water to penetrate your home. Here’s what you can do:
- Inspect Caulking: Regularly check the caulking around your windows and doors for cracks or gaps. Reapply caulk as needed to ensure a watertight seal.
- Replace Weather Stripping: Worn or damaged weather stripping should be replaced immediately. This is an inexpensive yet effective way to prevent water intrusion and improve your home’s energy efficiency.
Maintain Your Foundation
The foundation is critical in protecting your home from water damage. Improper drainage and cracks can allow water to seep into your basement or crawl space, leading to structural issues. To safeguard your foundation:
- Ensure Proper Grading: The ground around your home should slope away from the foundation to direct water away. A good rule of thumb is to have a slope of at least six inches for every 10 feet. If the grading is incorrect, regrading the landscape might be necessary.
- Inspect for Cracks: Regularly check your foundation for cracks, especially after severe weather. Small cracks can be sealed with waterproof masonry sealer, but larger cracks may require professional attention.
- Install a French Drain: If water tends to pool around your foundation, consider installing a French drain or other drainage systems to divert water away from your home.
Pay Attention to Siding and Exterior Walls
Your siding and exterior walls act as a barrier against the elements, but over time, they can become vulnerable to water penetration. Proper maintenance will help ensure they continue to protect your home effectively.
- Check for Damage: Inspect your siding for any cracks, holes, or loose panels. Water can easily find its way into even the smallest openings, so repair any damage immediately.
- Repaint or Reseal: Repainting or resealing your exterior walls can add an extra layer of protection against water. This is particularly important for wood siding, which is more prone to water damage than other materials.
Ensure Proper Drainage
Water pooling around your home can eventually find its way inside. Ensuring that your property has proper drainage is key to preventing water intrusion.
- Keep Gutters and Downspouts Clear: Regularly cleaning your gutters is crucial, but don't forget about your downspouts. Ensure they are clear of debris and direct water at least 10 feet away from your foundation.
- Consider Installing a Sump Pump: If your home is prone to water buildup, especially in the basement, a sump pump can help by automatically pumping water away from your home.
Conclusion
Preventing water intrusion starts with consistent exterior maintenance. By regularly inspecting and maintaining your roof, windows, doors, foundation, and drainage systems, you can protect your home from costly water damage. Staying proactive with these tips will help keep your home dry and secure, rain or shine.
For expert assistance with water damage restoration or if you need help protecting your home from water intrusion, trust SERVPRO® to be there for you. Whether you need emergency services or preventive maintenance, we’re just a call away.
By prioritizing these exterior maintenance tasks, you can safeguard your home against water intrusion and avoid the stress of unexpected repairs.
Understanding the Impact of Storm Surge on Coastal Properties
9/11/2024 (Permalink)
 Remember, SERVPRO can help you navigate through the storm and restore your peace of mind.
Living along the coast comes with the beauty of ocean views and the tranquility of seaside living. However, coastal properties are particularly vulnerable to the devastating effects of storm surge. At SERVPRO®, we understand the significant impact storm surge can have on your property and are here to provide insights on how to prepare and protect your coastal home.
What is Storm Surge?
Storm surge is an abnormal rise in sea level caused by a storm, typically a hurricane or tropical storm, pushing seawater onto the shore. Unlike regular tides, storm surges can lead to rapid and extreme flooding, causing substantial damage to coastal properties. The severity of storm surge depends on various factors, including storm intensity, speed, size, and the coastal topography.
Impact on Coastal Properties
The impact of storm surge on coastal properties can be catastrophic. As water levels rise, homes and businesses along the coast face the risk of severe flooding, structural damage, and erosion. Floodwaters can inundate basements, ground floors, and even higher levels, depending on the surge's height. This influx of water can compromise the integrity of buildings, leading to costly repairs and extended recovery times.
Additionally, storm surge can erode shorelines and undermine the foundations of structures near the coast. This erosion not only affects the stability of buildings but also reduces the natural barriers that protect properties from future storms. The force of the surge can also carry debris, further damaging properties and creating hazardous conditions.
Preparing for Storm Surge
Preparation is key to mitigating the impact of storm surge on coastal properties. Here are some essential steps to protect your home or business:
- Elevate Your Property: If feasible, elevate your home or business above the base flood elevation. This can significantly reduce the risk of flood damage during a storm surge.
- Install Storm Shutters: Protect windows and doors with storm shutters to prevent water from entering your property during a surge.
- Seal Gaps and Cracks: Ensure that all gaps, cracks, and openings in your property’s foundation and walls are sealed to prevent water intrusion.
- Create a Flood Barrier: Use sandbags or other flood barriers around your property to redirect floodwaters away from your home or business.
- Secure Outdoor Items: Remove or secure outdoor furniture, equipment, and other items that can become projectiles during a storm surge.
Recovery and Restoration
In the aftermath of a storm surge, swift action is crucial to minimize further damage and begin the restoration process. At SERVPRO, we specialize in storm damage restoration and are equipped to handle the unique challenges posed by storm surge. Our team of professionals will assess the damage, extract floodwaters, and restore your property to its pre-storm condition efficiently and effectively.
Understanding the impact of storm surge on coastal properties is essential for homeowners and business owners in coastal areas. By taking proactive measures to prepare and protect your property, you can reduce the risk of damage and ensure a quicker recovery. Remember, SERVPRO can help you navigate through the storm and restore your peace of mind.
Top 5 Hidden Places You Might Find Mold
7/17/2024 (Permalink)
As a homeowner, discovering mold can be a daunting experience. Mold growth is not only unsightly, but it can also damage the integrity of your home. At SERVPRO®, we understand the importance of maintaining a mold-free environment, and we’re Here to Help® you identify the top five hidden places mold might be lurking in your home. By keeping an eye on these spots, you can catch mold early and take the necessary steps to eliminate it.
1. Behind Wallpaper and Drywall
One of the most common places mold hides is behind wallpaper and drywall. These areas can trap moisture from leaks or high humidity, providing the perfect environment for mold to thrive. If you notice any peeling wallpaper or discolored patches on your walls, it might be worth taking a closer look. Regularly inspect these areas, especially if you’ve recently experienced water damage.
2. Underneath Carpeting and Flooring
Mold can easily develop under carpets and flooring, especially if there’s been a spill or flooding that wasn’t thoroughly dried. Basements and bathrooms are particularly susceptible due to their higher humidity levels. To prevent mold growth, ensure that any spills are promptly cleaned up and that your floors are kept dry. Occasionally, check under your carpets and flooring for any signs of mold.
3. Inside HVAC Systems
Your HVAC system can be a hidden breeding ground for mold. The system's ducts and coils can accumulate dust and moisture, creating an ideal environment for mold spores to grow. Regular maintenance and cleaning of your HVAC system can prevent mold from spreading throughout your home. Change your filters regularly and have a professional inspect your system annually.
4. Behind Appliances
Appliances such as refrigerators, washing machines, and dishwashers are common culprits for hidden mold. These appliances can leak or produce condensation, leading to moisture build-up in hard-to-reach places. Pull these appliances away from the wall periodically to check for any signs of mold and clean the areas thoroughly. Regularly inspect the hoses and connections for leaks.
5. Inside Cabinets and Closets
Cabinets and closets, especially those in bathrooms and kitchens, can harbor mold due to their enclosed spaces and lack of ventilation. Leaky pipes or sinks can contribute to moisture build-up in these areas. Keep your cabinets and closets dry and well-ventilated by using moisture-absorbing products and periodically checking for leaks or signs of mold.
How SERVPRO Can Help
At SERVPRO, we are experts in mold remediation. Our team is equipped with advanced tools and techniques to identify and eliminate mold from your home. If you suspect mold in any hidden areas, don’t hesitate to reach out to us. We’re here to restore your home to a safe and clean condition.
Remember, early detection and regular maintenance are key to preventing mold growth. By keeping an eye on these hidden places, you can ensure your home remains mold-free. For professional mold remediation services, contact SERVPRO today. We’re Here to Help® make it “Like it never even happened.”
Using ozone treatments to eliminate smoke odor
7/10/2024 (Permalink)
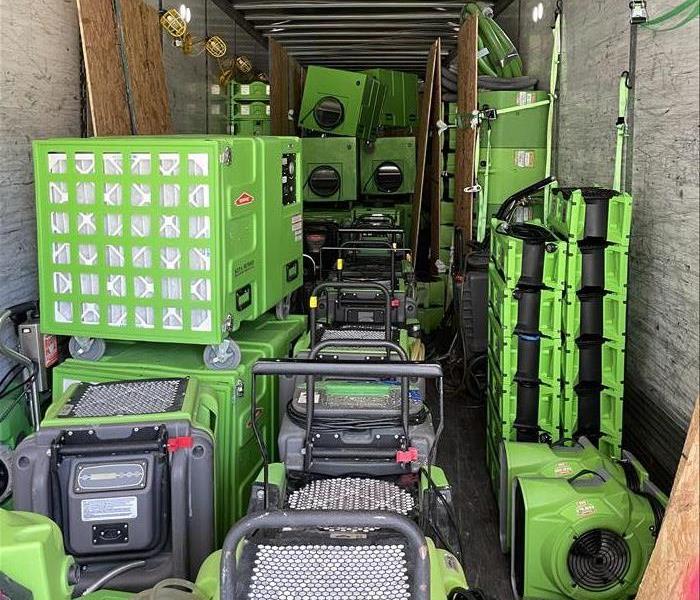 At SERVPRO, our trained technicians use state-of-the-art ozone generators to deliver top-notch smoke odor removal services.
At SERVPRO®, we understand that smoke odors can linger long after a fire has been extinguished, creating an unpleasant environment and a constant reminder of the disaster. Whether it's from a kitchen mishap, a wildfire, or an accidental fire, smoke leaves behind a pervasive smell that can be challenging to eliminate. That's where ozone treatments come in, offering a powerful solution for removing stubborn smoke odors effectively and efficiently.
What is Ozone Treatment?
Ozone treatment involves the use of ozone gas (O3) to neutralize and eliminate odors at a molecular level. Ozone is a naturally occurring molecule composed of three oxygen atoms. When ozone comes into contact with odors, pollutants, or bacteria, it reacts with them and breaks them down, rendering them odorless and harmless.
How Ozone Treatment Works
The process begins with the placement of an ozone generator in the affected area. This machine generates ozone gas and disperses it throughout the space. As the ozone molecules encounter smoke particles, they oxidize them, breaking down the molecules responsible for the smell. This chemical reaction not only neutralizes the odor but also ensures it doesn't return, providing a long-term solution.
Advantages of Using Ozone Treatments for Smoke Odor
- Effective Odor Elimination: Ozone treatments are highly effective at removing even the most stubborn smoke odors. The gas can penetrate hard-to-reach areas, ensuring comprehensive odor removal.
- Non-Invasive: Unlike some odor removal methods that require scrubbing and cleaning every surface, ozone treatment works by simply filling the space with ozone gas, making it a non-invasive option.
- Quick Results: Ozone treatments can significantly reduce smoke odors within a few hours to a couple of days, depending on the severity of the odor and the size of the area being treated.
- Versatility: Ozone treatment can be used in various settings, including homes, offices, vehicles, and any other enclosed spaces that have been affected by smoke.
When to Consider Ozone Treatment
- After a Fire: The aftermath of a fire often leaves behind smoke odors that can permeate furniture, carpets, walls, and even HVAC systems. Ozone treatments are ideal for removing these deep-seated smells.
- Persistent Smoke Odor: If you've tried other odor removal methods without success, ozone treatment might be the solution you need. Its ability to penetrate deeply into materials makes it highly effective.
- Large Areas: For large spaces, such as commercial buildings or industrial facilities, ozone treatment provides a thorough and efficient way to eliminate smoke odors without the need for extensive manual labor.
Trust SERVPRO for Professional Ozone Treatments
At SERVPRO, our trained technicians use state-of-the-art ozone generators to deliver top-notch smoke odor removal services. We follow a detailed process to ensure that your property is treated safely and effectively, restoring it to a fresh and clean state.
If you're struggling with lingering smoke odors, contact SERVPRO today. Our expert team is ready to help you breathe easier and enjoy a smoke-free environment once again. Let us handle the odors, so you can focus on moving forward.
Water Damage Prevention: Avoid These Common Homeowner Mistakes
6/20/2024 (Permalink)
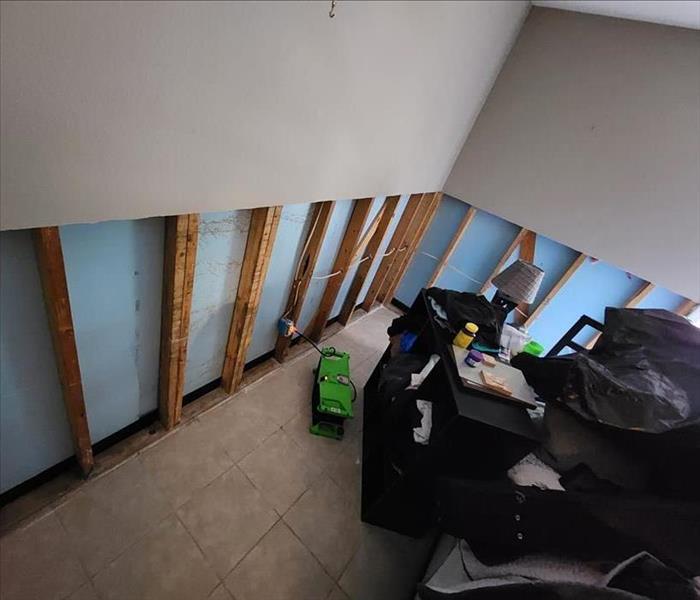 By avoiding these common mistakes and being proactive, you can protect your property from water damage disasters.
Water damage is a common and often expensive issue for homeowners, but many instances of water damage can be prevented with the right knowledge and precautions. Unfortunately, there are several common mistakes that homeowners make that can lead to water damage in their homes. By understanding these mistakes and taking proactive measures to address them, you can protect your home from potential water damage disasters. Here are some of the most common mistakes to avoid:
Neglecting Regular Maintenance
One of the most common mistakes homeowners make is neglecting regular maintenance tasks that can help prevent water damage. This includes failing to clean gutters and downspouts regularly, which can lead to clogs and water overflow during heavy rainfall. It also includes neglecting to inspect and maintain your plumbing system, such as checking for leaks, loose connections, or corrosion in pipes.
Ignoring Warning Signs
Ignoring warning signs of potential water damage can lead to larger issues down the road. Signs such as water stains on walls or ceilings, musty odors, peeling paint or wallpaper, or warped flooring should not be ignored. These could indicate hidden leaks, plumbing problems, or other issues that need to be addressed promptly to prevent further damage.
Improper Installation
Another common mistake is improper installation of appliances, fixtures, or plumbing systems. Poorly installed appliances like dishwashers, washing machines, or water heaters can leak or malfunction, leading to water damage over time. Similarly, improperly installed plumbing fixtures or connections can result in leaks or bursts that cause significant water damage to your home.
DIY Plumbing Repairs
Attempting DIY plumbing repairs without the necessary knowledge or experience can also lead to water damage. While it may be tempting to try to fix a leak or plumbing issue yourself to save money, improper repairs can worsen the problem and cause more extensive damage. It's best to leave plumbing repairs to qualified professionals who have the expertise and tools to do the job correctly.
Not Having Adequate Insurance Coverage
Finally, not having adequate insurance coverage can leave homeowners financially vulnerable in the event of water damage. It's essential to review your homeowner's insurance policy regularly and ensure that you have coverage for water damage caused by common sources such as burst pipes, plumbing leaks, or weather-related events. Consider adding optional coverage for specific types of water damage, such as sewer backup or flood insurance, depending on your location and risk factors.
By avoiding these common mistakes and taking proactive steps to prevent water damage in your home, you can protect your property and avoid the costly and stressful consequences of water damage disasters. Regular maintenance, prompt repairs, and proper insurance coverage are essential components of a comprehensive water damage prevention strategy. Remember that prevention is key when it comes to protecting your home from water damage, so take action today to protect your property for the future.
Navigating Water Damage After a Southeastern Storm
5/15/2024 (Permalink)
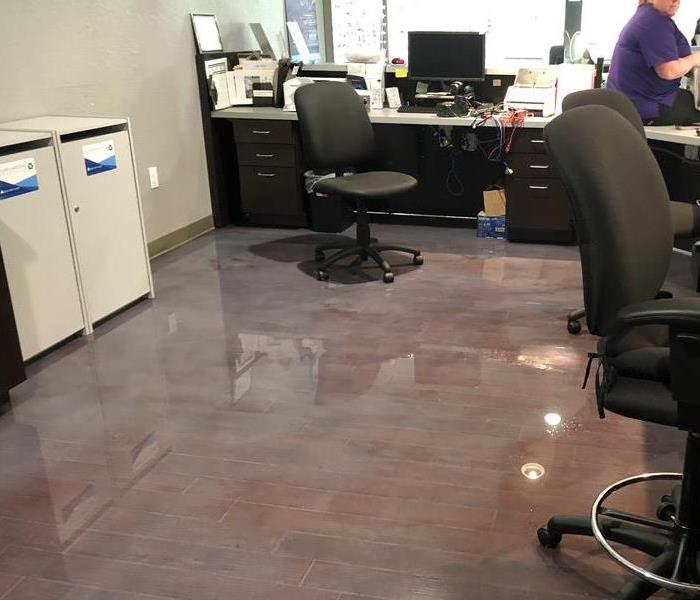 Dealing with water damage after a storm can be challenging, but with the right approach, you can effectively restore your property.
Water damage is a common aftermath of storms in Florida, where heavy rainfall and flooding are frequent occurrences. Dealing with water damage can be overwhelming, but understanding the necessary steps can help homeowners navigate the process effectively. Here's a comprehensive guide to dealing with water damage after a storm:
1. Safety First
Before attempting any cleanup or restoration efforts, prioritize safety. Turn off the power supply to affected areas if it's safe to do so, and avoid contact with standing water, as it may contain harmful contaminants or pose electrical hazards. Wear protective gear, such as gloves and boots, to minimize exposure to potential hazards.
2. Assess the Damage
Once it's safe to do so, assess the extent of the water damage in your home. Check for visible signs of water intrusion, such as soaked carpets, water stains on walls or ceilings, and warped or damaged flooring. Take photos or videos of the damage for insurance purposes and documentation.
3. Remove Standing Water
Promptly remove any standing water from your home to prevent further damage and mold growth. Use a wet/dry vacuum, mops, or towels to soak up excess water. If the water level is too high or if there's significant flooding, consider seeking professional assistance from water damage restoration experts like SERVPRO®.
4. Dry Out the Affected Areas
Thoroughly dry out the affected areas using fans, dehumidifiers, and natural ventilation. Open windows and doors to promote air circulation, and use fans to expedite the drying process. Pay special attention to hidden or hard-to-reach areas, such as behind walls or under flooring, as moisture trapped in these areas can lead to mold growth and structural damage.
5. Clean and Disinfect
After removing standing water and drying out the affected areas, thoroughly clean and disinfect all surfaces to prevent mold and bacteria growth. Use a mild detergent or disinfectant solution to clean walls, floors, and other surfaces that came into contact with floodwater. Pay attention to furniture, appliances, and personal belongings that may also require cleaning and disinfection.
6. Monitor for Mold
Keep a close eye on your home for any signs of mold growth in the days and weeks following the water damage. Mold thrives in damp, humid environments, so it's essential to maintain proper ventilation and humidity levels to prevent mold from taking hold. If you notice any signs of mold growth, such as musty odors or visible mold growth, contact a professional mold remediation specialist like SERVPRO for assistance.
7. Work with Your Insurance Company
Finally, contact your insurance company to file a claim for the water damage and begin the claims process. Provide them with documentation of the damage, including photos, videos, and receipts for any repairs or restoration work. Work closely with your insurance adjuster and restoration professionals to ensure that your home is restored to its pre-damage condition.
Dealing with water damage after a storm can be challenging, but with the right approach and assistance, homeowners can effectively restore their homes and minimize further damage. By following these steps and working with experienced professionals like SERVPRO of NE Hillsborough/Plant City, homeowners can navigate the process of water damage restoration with confidence and peace of mind.
The Benefits of Professional Upholstery Cleaning After a Fire
4/17/2024 (Permalink)
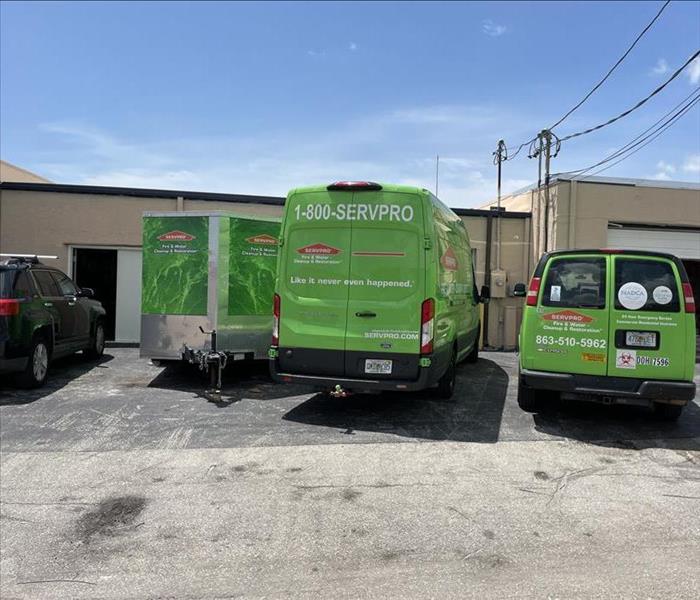 In this blog, we will explore the benefits of professional upholstery cleaning after a fire, highlighting the importance of material cleaning.
After a fire incident, the damage caused by smoke and soot extends beyond the structure itself. Upholstered furniture and fabrics can suffer significant smoke and fire damage, resulting in unpleasant odors, stains, and soot particles deeply embedded within the materials. Professional upholstery cleaning services are crucial in restoring fire-damaged upholstery and ensuring its longevity. In this blog, we will explore the benefits of professional upholstery cleaning after a fire, highlighting the importance of material cleaning and contents restoration in comprehensive fire damage restoration and remediation efforts.
Efficient Smoke and Soot Removal
Professional upholstery cleaning after a fire ensures thorough smoke and soot removal from your furniture. Trained technicians use specialized equipment, such as high-powered vacuums and industrial-grade cleaning agents, to effectively extract and eliminate smoke particles, soot, and residue from the fabric. This meticulous cleaning process minimizes the risk of lingering odors and prevents further damage caused by corrosive soot particles.
Restoration of Upholstery Appearance
Fire and smoke damage can leave upholstery looking dull, discolored, and stained. Professional upholstery cleaning techniques, such as hot water extraction or dry cleaning, help restore the appearance of the fabric by removing soot, stains, and discoloration. With the right cleaning methods and products, technicians can revive the color, texture, and overall aesthetics of the upholstery, making it look fresh and clean once again.
Elimination of Lingering Odors
One of the most significant benefits of professional upholstery cleaning after a fire is the elimination of lingering smoke odors from the fabric. Smoke particles tend to embed themselves deep within the upholstered material, leading to persistent and unpleasant smells. Professional cleaning methods, such as steam cleaning and deodorization, effectively remove these odor-causing particles, leaving the upholstery smelling fresh and free from any reminders of the fire incident.
Prevention of Further Damage
When left unaddressed, smoke residues and soot particles can further damage upholstery over time. The corrosive nature of these particles can cause discoloration, staining, and even deterioration of the fabric fibers. By professionally cleaning the upholstery promptly after a fire, you prevent the risk of progressive damage, extending the lifespan of the furniture and protecting your investment.
Restoration of Contents
Professional upholstery cleaning is an essential component of comprehensive contents restoration after fires. Furniture and upholstery are valuable assets, and restoring them can significantly reduce replacement costs. By investing in professional cleaning services, you can salvage fire-damaged upholstery, bringing it back to its pre-fire condition and preserving cherished items with sentimental value.
Expertise and Access to Specialized Equipment
Professional upholstery cleaning services bring expertise and industry knowledge to the restoration process. Trained technicians have the experience to handle various upholstery materials, identifying the most effective cleaning methods and products for optimal results. Additionally, they have access to specialized cleaning equipment and tools that are not readily available to homeowners. Their expertise paired with advanced equipment ensures thorough and efficient cleaning, enhancing the overall success of fire damage restoration efforts.
Professional upholstery cleaning plays a crucial role in fire damage restoration and remediation. By efficiently removing smoke and soot particles, restoring the appearance of upholstery, eliminating lingering odors, and preventing further damage, professional cleaning services offer invaluable benefits. When faced with fire-damaged upholstery, it is essential to engage the services of professional fire damage restoration experts, such as SERVPRO®, who possess the knowledge, expertise, and specialized equipment needed for effective material cleaning and contents restoration. Let the professionals handle the restoration process, and you can have confidence in the successful recovery of your upholstered furniture after a fire.
Mold Removal vs. Mold Remediation: What's the Difference?
3/13/2024 (Permalink)
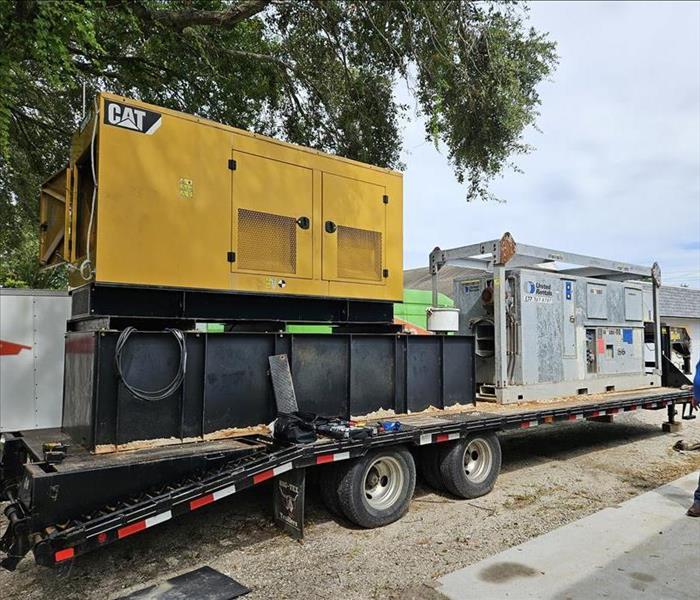 When it comes to dealing with mold in your home, it's important to understand the difference between mold removal and mold remediation.
When it comes to dealing with mold in your home, it's important to understand the difference between mold removal and mold remediation. While these terms are often used interchangeably, they refer to distinct processes. In this blog, we will explore the differences between mold removal and mold remediation, shedding light on the appropriate approach to address mold issues effectively.
Mold Removal: A Temporary Solution
Mold removal, also known as mold cleanup or mold abatement, refers to the process of physically removing visible mold growth from surfaces. This process typically includes wiping, scrubbing, or vacuuming affected areas to eliminate visible mold.
While mold removal can effectively get rid of existing mold growth, it does not address the underlying cause of the mold issue. Without eliminating the moisture problem or source of humidity, mold is likely to reappear in the future. Therefore, mold removal alone is considered a temporary solution and does not provide long-term protection against mold recurrence.
Mold Remediation: A Comprehensive Approach
On the other hand, mold remediation takes a more comprehensive approach. Mold remediation focuses not only on removing mold growth but also on addressing the underlying causes and preventing future mold problems.
Mold remediation involves the following steps:
- Assessment: Trained professionals inspect the affected area to identify the extent of mold growth, sources of moisture, and potential hidden mold.
- Containment: To prevent the spread of mold spores, technicians isolate the affected area using physical barriers and negative air pressure systems.
- Filtration: High-efficiency particulate air (HEPA) filters are used to capture and remove mold spores and other particles from the air during the remediation process.
- Mold Removal: Mold-affected materials that cannot be salvaged are safely removed and disposed of. The remaining surfaces are thoroughly cleaned and treated with antimicrobial agents to inhibit mold growth.
- Moisture Control: Professionals address the moisture problem by repairing leaks, improving ventilation, or implementing appropriate drying techniques to ensure long-term prevention of mold growth.
- Restoration: Finally, mold restoration services restore the affected area to its pre-damage condition. This may involve repairing or replacing damaged materials, such as drywall or flooring.
The Benefits of Mold Remediation
Compared to mold removal alone, mold remediation provides several key benefits:
- Long-Term Solution: By addressing the underlying moisture issue, mold remediation helps prevent future mold growth, providing a more long-term solution.
- Comprehensive Approach: Mold remediation not only removes visible mold but also ensures thorough cleaning and treatment of affected surfaces, reducing the risk of mold recurrence.
- Professional Expertise: Trained professionals, such as those at SERVPRO, have the knowledge, experience, and specialized equipment necessary to effectively handle mold remediation.
- Property Restoration: Mold restoration services included in the remediation process help restore your property to its pre-damage condition, saving you time, money, and stress.
Mold Restoration Services
Understanding the difference between mold removal and mold remediation is crucial for effectively addressing mold issues in your home. While mold removal alone provides a temporary solution by eliminating visible mold growth, mold remediation takes a comprehensive approach by addressing the underlying causes, preventing future mold problems, and restoring your property.
When it comes to mold issues, it's best to consult professionals like SERVPRO® who offer mold remediation and restoration services. Their expertise and specialized equipment ensure that mold problems are handled thoroughly and effectively, providing you with peace of mind and a safe, mold-free living environment.


 24/7 Emergency Service


